Backyard Putting Green Installation: Transforming Your Outdoor Space into a Golfer’s Paradise
Golf is a game of patience, precision, and practice. For enthusiasts, the allure of spending extra hours refining their short game is irresistible. Yet, frequenting the golf course every day isn’t always feasible. That’s where a backyard putting green installation comes in—a perfect solution for homeowners looking to combine leisure, skill improvement, and outdoor luxury.
With the growing popularity of artificial turf and customizable landscaping, backyard putting greens have become a sought-after addition to modern homes. They are functional, low-maintenance, and aesthetically pleasing. This article explores everything you need to know about backyard putting green installation, from benefits and design considerations to the step-by-step installation process and long-term care.
The Benefits of a Backyard Putting Green
1. Practice at Your Convenience
One of the most obvious advantages is accessibility. No more driving to the nearest golf course—your practice space is right outside your door. This convenience can dramatically improve your game, especially your putting and chipping skills.
2. Low Maintenance and Durability
Modern artificial turf is designed to withstand heavy use and diverse weather conditions. Unlike natural grass, it doesn’t require mowing, watering, or fertilizing, making it both eco-friendly and cost-effective in the long run.
3. Family-Friendly Recreation
A backyard putting green isn’t just for avid golfers. It doubles as a recreational feature for family and friends, providing entertainment during gatherings or casual evenings at home.
4. Boosts Property Value
A well-designed backyard putting green enhances curb appeal and can significantly increase your property’s market value. Buyers often view it as a unique luxury feature that sets your home apart.
See also: What to Expect During a Home Insulation Installation
Key Design Considerations Before Installation
Installing a backyard putting green isn’t a one-size-fits-all project. It requires careful planning tailored to your space, skill level, and lifestyle.
1. Space and Layout
- Small yards can accommodate simple single-hole greens.
- Larger yards allow for multi-hole designs with different slopes and elevations.
- Consider blending the putting green with other landscaping features like patios, gardens, or outdoor kitchens.
2. Turf Selection
Not all artificial turfs are the same. For putting greens, turf fibers must be short, dense, and smooth to simulate the ball roll of natural greens. Popular options include:
- Nylon turf: Highly durable, ideal for heavy use.
- Polypropylene turf: Cost-effective, good for moderate use.
- Hybrid turf systems: Combine durability and realism for an authentic golf course feel.
3. Drainage and Base Preparation
Proper drainage ensures the surface remains playable after rain. The base must be graded and compacted to allow water to flow away naturally, preventing puddling or turf damage.
4. Elevation and Contours
Slopes, undulations, and breaks add realism and challenge. Depending on your skill level, you can design anything from a flat surface for practice to a multi-tiered green with bunkers and fringe.
5. Additional Features
- Chipping areas for short approach practice.
- Sand bunkers for advanced training.
- Lighting systems for nighttime play.
- Landscaping borders to blend the green with the rest of the yard.
Step-by-Step Backyard Putting Green Installation
Installing a backyard putting green can be a DIY project if you’re handy, though many homeowners prefer hiring professionals for precision. Below is a general step-by-step guide.
Step 1: Planning and Design
- Measure your available space.
- Sketch the layout with hole placements, slopes, and fringe areas.
- Decide on the type of turf and additional features.
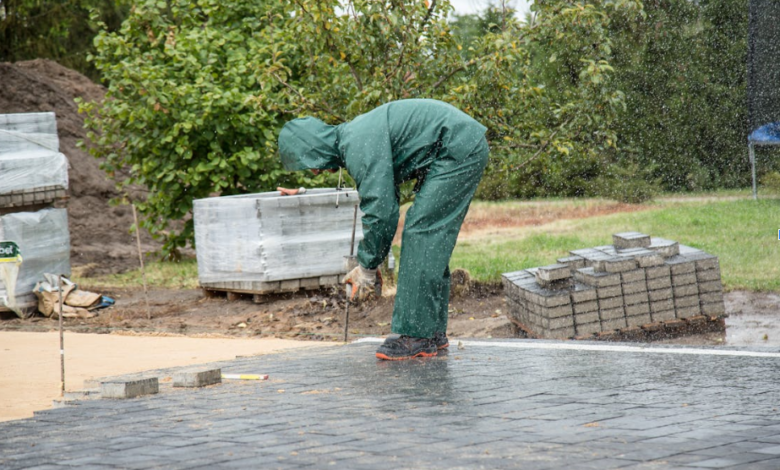
Step 2: Excavation and Ground Preparation
- Clear the area of grass, rocks, and debris.
- Excavate to a depth of about 4–6 inches, depending on the desired base.
- Ensure the edges are well-defined to hold the turf securely.
Step 3: Installing the Base
- Lay a compacted base of crushed stone or decomposed granite.
- Compact it with a plate compactor to create a solid, even surface.
- Check grading to ensure proper drainage.
Step 4: Adding a Cushion Layer
Some installations use a layer of sand or shock-absorbing material to mimic the feel of natural greens and control ball roll.
Step 5: Laying the Turf
- Roll out the artificial turf across the prepared base.
- Ensure the turf grain runs consistently to avoid uneven ball movement.
- Trim edges with a utility knife for a precise fit.
Step 6: Securing the Turf
- Use landscape nails or adhesive to secure turf edges.
- For large installations, seam multiple pieces together using seam tape and adhesive.
Step 7: Inserting the Cups and Flags
- Cut holes in the turf where you’ve planned your putting cups.
- Insert the cups and flags securely for a professional finish.
Step 8: Sand Infill and Brushing
- Spread fine silica sand as infill to weigh down the turf and control ball speed.
- Brush the turf fibers upright using a power broom for a smooth playing surface.
DIY vs. Professional Installation
- DIY Installation: More budget-friendly, gives you complete creative control. However, it requires significant time, effort, and precision, especially when shaping contours and ensuring proper drainage.
- Professional Installation: While more expensive, professionals bring expertise, specialized equipment, and the ability to create a polished, long-lasting result.
If your goal is a high-end green with advanced features, professional installation is often worth the investment.
Cost of Backyard Putting Green Installation
The cost varies widely based on size, materials, and design complexity. On average:
- DIY kits: $10–$20 per square foot.
- Professional installations: $20–$40 per square foot.
- Luxury designs with bunkers and landscaping: $50+ per square foot.
While the upfront cost can be significant, the long-term savings on golf course fees and lawn maintenance can make it a worthwhile investment.
Maintenance Tips for Longevity
Although artificial turf requires less upkeep than natural grass, some maintenance ensures its longevity and performance.
- Regular Brushing: Keeps turf fibers upright and maintains consistent ball roll.
- Debris Removal: Clear leaves, twigs, and dirt regularly.
- Weed Control: Inspect edges and seams to prevent weed growth.
- Rinse Occasionally: Hose down the surface to remove dust and refresh the turf.
- Check Cups and Flags: Ensure cups are level and flags remain sturdy.
With proper care, a backyard putting green can last 10–15 years or more.
Sustainability and Eco-Friendly Aspects
Artificial turf conserves water, eliminates the need for fertilizers and pesticides, and reduces emissions from lawnmowers. For eco-conscious homeowners, this makes backyard putting greens a sustainable choice compared to maintaining natural grass.
Final Thoughts
A backyard putting green installation is more than just a home upgrade—it’s an investment in lifestyle, recreation, and skill development. Whether you’re a golf enthusiast aiming to refine your short game, a family seeking an outdoor entertainment hub, or a homeowner looking to elevate your property’s appeal, a putting green delivers on all fronts.
From planning and turf selection to installation and maintenance, every detail shapes the outcome. While DIY is possible for smaller projects, professional installation ensures a flawless, golf-course-quality finish. With durability, low upkeep, and endless enjoyment, a backyard putting green transforms your outdoor space into a personal golfing sanctuary.